header1

header1
Showing posts with label Craft Dolly. Show all posts

Thursday, November 7, 2013

Pirate Tooth Fairy Pillow


How is my child old enough to start loosing his baby teeth?! Its strange, I tell ya, to see my oldest child's teeth falling out, and my youngest child's teeth coming in. Both of which is making me a little emotional! The beginnings and the ends, all wrapped up into one!

Me: Get a grip, Holly, they are just teeth!
Self: I know... but my babies!!! My babies are growing up!

I wasn't prepared for the 1st tooth to fall out. I was working when I received this sad looking picture from my Husband:
Pathetic looking, right? With that single tear on his cheek... a little blood on his chest... And what do we do? We take a picture and then blog it to the world, HA!

Apparently this tooth had been loose, and Roman some how fell on his bed, hit it a certain way, knocked it out, and we are pretty sure he then swallowed it.

If you don't know my eldest child, let me tell ya, this was not an ideal way for this experience to go down. It turns out it was quiet traumatizing (in a funny way, of course) and He was not interested in talking about loosing his tooth... or the idea of loosing any more teeth.

So, to make this stage of life a little more fun, I was prepared for the second tooth to fall out by making him a Tooth Fairy pillow. Of course my Mommy magic (and the help of some money) quickly turned the thought of loosing teeth into something exciting for this big boy!

 The second tooth just hung in there, for what seemed like forever (a month). My little redneck son, missing his one front tooth was making me crazy. As that puppy just hung on by a stand I tried everything to convince him to just pull it out, but He wasn't having it. Then one day, FINALLY, we were brushing his teeth and out it came! Yippeee! The Tooth Fairy was on Her way! She had an IOU for the first tooth and was prepared to pay for the second!

When it comes to sewing projects, I am horrible about offering a tutorial. I do everything freehand and don't use templates. I did get the idea of a pirate pillow from Pintrest but offered my own spin on it :) So,  for this one I at least remembered to take a picture of the pieces I cut out. I wanted the pillow to either be hung on the door knob or stand upright on his dresser. So I made it complete with roots :)
(My dental assisting school colleagues will appreciate that!)

Romans Pirate Tooth Fairy Pillow :)
Complete with a bag, labeled "R" for Roman, that the Tooth Fairy can put Her gold coins inside!

I love how it turned out!

Saturday, November 2, 2013

Happy Fall Ya'll!

Halloween has now passed and the Super Hero costumes are all hung in the closet. Sadly, but not surprisingly, the Mall is already jamming Christmas tunes.....
BUT FYI: It's still Fall, Ya'll!
Roman and Noah are Batman and Robin
Lydia and Sophia are Super Girl and Spidey
Mom and Dad are just plan crazy


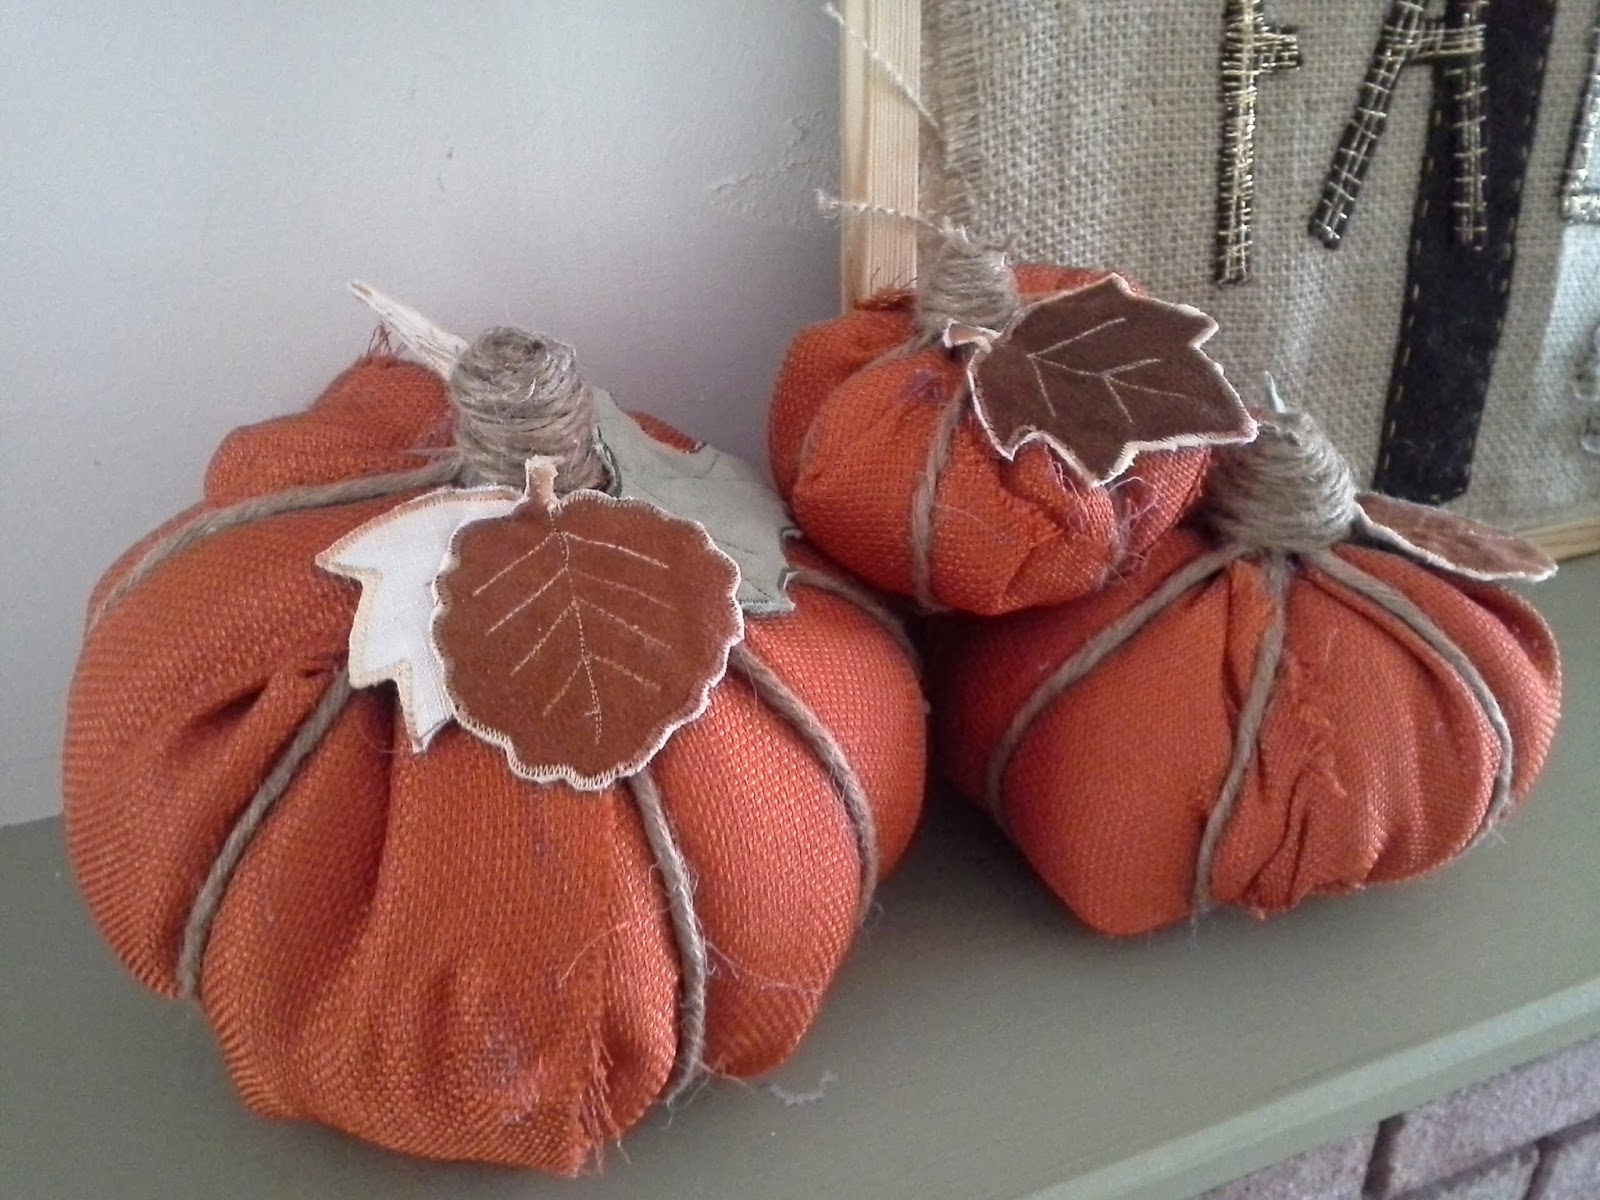
This and that from around the house :)
Burlap Pumpkins made by the one and only :)
Kitchen message board
Fabric leaves hanging from the chandelier

Simple: glass jars and a little bit of fall foliage

Yes, I like chalk board paint :)

Tuesday, June 11, 2013

Fabric Covered Boxes with DIY Fabric Flowers

I'm beginning to hoard glass jars like your old lady neighbor in Parma. Suddenly I no longer see a jar of salsa or spaghetti sauce, but crafting magic- CRAFTING MAGIC! I was kinda just shoving them everywhere I could, then eventually moved them into the laundry room, then decided them falling off the wire shelf was no good either, so THEN I decided to put them into some diaper boxes that fit perfectly on the shelf. But plain diaper boxes? NEVAH!

must.make.pretty.


I had some scrap fabric laying around, and it was enough to cover the diaper boxes. I used my hot glue gun to secure the fabric. Now onto these super cute fabric flowers... You could use these flowers for numerous ideas, from making a little girls headband, to decorating a present.


Looking for something similar? Look here: Fall Sewing Craft

Sunday, January 20, 2013

Salt Dough Ornaments

     
I have been wanting to post this for a while now. Since the new year we've been passing around a yucky bug and I haven't had much of a chance to post. But don't fret! I am now back :)

     Who remembers making salt dough ornaments in kindergarten  I do! And now I'm making them with MY kindergartner :) Time flies....


To make your own salt dough you will need:
1/2 cup of salt
1/2 cup of water
1 cup of flour

     Mix salt and flour in a mixing bowl. Slowly add in the water while mixing. You might not need all of it. You want it be kinda dry, but if it gets too sticky, then add a little more flour. Once its the right consistency, knead the dough and then roll out and use cookie cutters to make your shape. Be sure to use a pencil and make a small hole at the top so you are able to make a tree hanger.

     There are several ways to cook the dough. You could simply let the dough sit out for about 3 days to harden. You could also set your oven to it's lowest temp and bake for 3 hours or until hard. OR, if you are really impatient, LIKE ME, you can just pop 'em in the microwave for 3 minutes! If they are still wet after 3 minutes, continue cooking in 20 second intervals until hard. Allow to cool.

     I made star ornaments covered in gold glitter. Using Modge-Podge and a sponge brush, I coated each star and then covered with glitter. Once dried, I applied a second coat of Modge-Podge on top to seal the glitter on. We had a lot of fun!

Tuesday, January 1, 2013

Christmas Photo Book


I love getting the photo Christmas cards in the mail. I like to save them and look at them through the years. I especially like seeing kids that I don't get to see as much anymore grow through the years. I started having so many that I decided to make a cute little book with them. I organized them by size and put a whole punch through them. Then I just loosely tied some ribbon so I could add more as the years go by! Now I will proudly display every Christmas :)

Tuesday, October 30, 2012

The Christian Pumpkin


Through the years I have taught all different age groups at church, as well as daycare. I love pumpkins, I love fall and these are some of the lessons I've used over the years based on the age group! "The Gospel Pumpkin" was one that was fun to do with my toddler class. We would pre cut the shapes and have the kids glue them their paper as we went through the poem. I also think this would make a great felt board story for circle time :)

The Gospel Pumpkin
I am a Jack O' Lantern 
My light will shine so bright. 
For I am a Christian pumpkin 
My symbols tell what's right.

My nose is like the cross 
on which our Savior died. 
To set us free from sin 
We need no longer hide.

My mouth is like a fish 
The whole wide world to show
That Christians live in this house 
And love their Savior so! 

The story starts at Christmas
My eyes are like the star 
That shone on Baby Jesus 
And wise men saw from far. 

My color it is orange 
Just like the big bright sun 
That rose on Easter Day 
Along with Gods' own Son.

And so on Halloween 
Let's set our pumpkins out 
And tell the trick or treaters 
What Gods' love is all about! 
Author Unknown


With my 4-6 year old Sunday School class we enjoyed this Pumpkin themed lesson called "The Pumpkin Prayer." Just demonstrate on a large carving pumpkin and have the kids watch and/or help. Have them pray this prayer, as well as give them a copy to take home.

The Pumpkin Prayer
Dear God,
As I carve my pumpkin help me say this prayer:

Open my mind so I can learn about You;
(Cut the top of the pumpkin)
Take away all my sin and forgive me for the wrong things I do.
(Clean out the inside)
Open my eyes so Your love I will see;
(Cut the eyes out in heart shapes)
I'm so sorry for turning up my nose to all you've given me.
(Cut a nose in the shape of a cross)
Open my ears so your word I will hear.
(Cut the ears shaped like the Bible)-we did rectangles
Open my mouth so I can tell others You're near
(cut the mouth in the shape of a fish)
Let Your light shine in all I say and do! Amen.
(Place a candle inside and light it)


At a chapel service I attended the youth pastor shared a message on how a pumpkin is like a christian. Here is the meat of that message. This would be great for elementary school kids.

How A Christian is like a pumpkin:
"God picks you from the patch, brings you in, and washes all the dirt off you may have gotten from the other pumpkins. Then he cuts the top off and scoops out all the yucky stuff. He removes the seeds of doubt, hate, greed, etc. Then He carves you a new smiling face and puts His light inside of you to shine for all the world to see."

1. Take a pumpkin. "You aren't a pumpkin, but all of us are something like one. God picks you from the patch, brings you in, and washes all the dirt off you may have gotten from the other pumpkins." Talk about how a pumpkin is like us: it has an outside and an inside. The outside is what people see. The inside is like our soul or our heart. A pumpkin left to itself will soon rot and die. We will die some day too." 

2. Carve out eyes and a small "o" shaped mouth.  As you make the holes and pull out the pieces of rind, ask people what they see inside (yucky stuff). "This is what we look like to others and what we are like when are hearts are not changed. The hearts of men are full of evil and there is madness in their hearts while they live (Ecclesiastes 9:3). How can we get rid of this icky stuff?" 

3. "God is the only one who can change our heart. But in order for God to change our heart we must become open to him." Carve an opening in the top of the pumpkin big enough to put your hand through. You might want to quote Revelation 3:20: Here I am! I stand at the door and knock. If anyone hears my voice and opens the door, I will come in and eat with him, and he with me. 

4. Put in your hand and pull out the insides. "God scoops out all the yucky stuff inside of us. He removes the seeds of doubt, hate, impurity, and greed." Talk about the cross and how Jesus was willing to become messy for us, so that we might be clean. I will cleanse you from all your impurities and from all your idols. I will give you a new heart and put a new spirit in you; I will remove from you your heart of stone and give you a heart of flesh. And I will put my Spirit in you and move you to follow my decrees and be careful to keep my laws. (Ezekiel 36:25b-27). 

5. "But if we leave a pumpkin with just the insides taken out, then it's just hollow. We need to have a light inside that will truly make us alive! Jesus said, 'I am the light of the world. Whoever follows me will never walk in darkness, but will have the light of life.' Add a light to the inside of the pumpkin. "When Jesus lives inside of you, you can glow! You will want to be kind and honest. You will want to please God, to help others, and to tell other people about your Friend and Lord." 

6. At this point you might want to carve the mouth into a smile! "God carves you a new smiling face and puts His light inside of you to shine for all the world to see."


Happy Fall, Ya'll

Saturday, October 20, 2012

Fall Sewing Project


Finally finished my little master piece :) I haven't sewed anything in a while and
decided to scoop up some scrap fabric and get creative.


Free hand, I made the leaves, tree trunk and letters. I 
added some "messy" embroidering as well as a little 
sparkle with gold thread.  


The backing is burlap and the whole tapestry is tacked 
onto cork board. I love how it turned out! 
A great addition to my fall decor!


Sunday, October 14, 2012

Pumpkin Fun


I got to take the boys to a local farm this weekend and my nephew and sister-in-law came along as well.

We had a lot of fun and the weather was gorgeous!!! 
Autumn in North Georgia is absolutely beautiful!

(Of course, what would be Autumn without some pumpkins?)
 
...and so started the first pumpkin craft of the season!

Roman and I decided to try something different, using crayons, glue, stickers and... a blow dryer!
First we picked out all the colors that remind us of Fall. We talked about the trees changing colors and how pretty it looks. We then took off any paper on the crayons and broke them in half. Using regular Elmer's glue, we put a generous amount around the top of the pumpkin and waited for it to get a little "tacky."

Then we talked about color patterns while placing the crayons in the glue. (patterns are still tricky for us!)

Now the fun part! With the blow dryer on low, we went around and around the pumpkin until the crayons began to melt. As the wax melted down it was a great opportunity to talk about heat and what it does to solid objects. Soon the crayons around the stem of the pumpkin began to blend making new colors, and Roman thought that was pretty cool :) 

Pretty cool looking, hu? With the blow dryer roman could manipulate the direction of the wax as well as how fast it melted. Once cooled we felt the new texture of the crayons, now made into a one of a kind pumpkin master piece! Once completely cooled, we used letter stickers to write our name. 
R-O-M-A-N

Happy Harvest!!!